
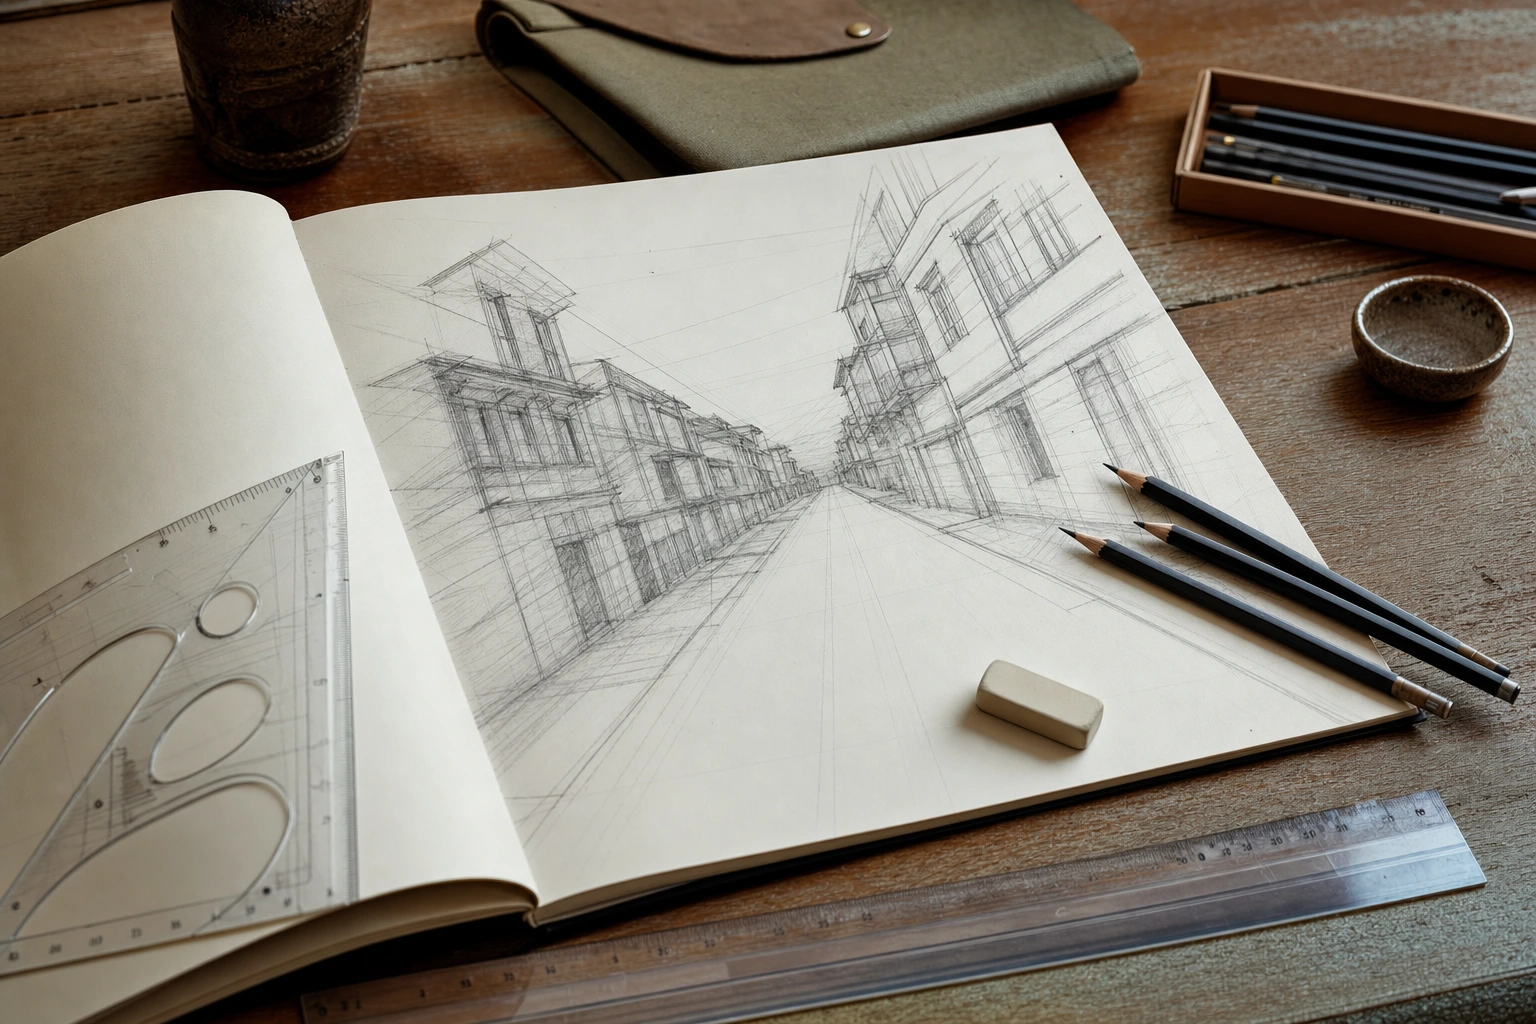
Perspective is the system artists use to represent three-dimensional space on a two-dimensional surface. It helps a drawing communicate distance, position and depth, allowing a viewer to understand whether a road extends into the distance, a room has believable walls or a building is being viewed from above.
Perspective is not only a technical method for architects and illustrators. It is a way of observing. Once you understand how the eye organises space, you can draw environments, objects and figures with greater confidence. The principles apply to pencil sketches, painting, digital illustration, comics, product design and visual communication.
What Perspective Means in Drawing
In everyday vision, objects appear to change as their distance from us changes. Nearby objects usually look larger and more detailed, while distant objects appear smaller and less distinct. Parallel edges may also seem to move towards one another as they recede. For example, the edges of a straight railway track appear to approach a point in the far distance even though the rails remain parallel in reality.
Drawing perspective translates these visual effects into deliberate marks. It does not mean that an artist must make every drawing mathematically exact. Rather, it provides a structure that makes spatial decisions consistent. You can then simplify, exaggerate or stylise the scene without losing its sense of depth.
The Core Elements of Perspective
Eye level and the horizon line
The horizon line represents the viewer's eye level. In an outdoor scene, it may correspond roughly to the physical horizon, but indoors it is better understood as an invisible horizontal line at the height of the observer's eyes. If you stand in a room, the horizon line remains at your eye level even when the actual landscape outside cannot be seen.
The position of the horizon changes the way a subject is viewed. A low horizon can make an object appear tall or imposing because more of its upper surfaces are hidden. A high horizon allows the viewer to see more of the top surfaces of objects, such as the top of a table, a roof or a market stall.
Vanishing points
A vanishing point is the point towards which a group of receding parallel lines appears to converge. Lines that are horizontal in the real world generally converge towards points on the horizon line. A road, corridor or row of buildings may therefore guide the eye towards one or more vanishing points.
Vanishing points do not have to be inside the paper. In a wide scene, some may fall far beyond the edges of the drawing. The important principle is that edges belonging to the same direction should relate to the same vanishing point. If the left and right edges of a box recede in the same direction but point towards different locations, the object will look distorted.
Orthogonal lines
Orthogonal lines are construction lines that travel from the subject towards a vanishing point. They may represent the edges of a floor, ceiling, road, box or building. The word does not mean that the lines must be visible in the finished drawing. Artists often use them lightly as guides and erase or reduce them later.
A useful habit is to identify the main directional families in a scene. For a rectangular room, one family may recede towards the left vanishing point, another towards the right vanishing point, while vertical edges remain upright. Organising these families before adding detail prevents small inaccuracies from accumulating.
One-Point Perspective
One-point perspective is used when the front face of an object or space is parallel to the picture plane and the receding edges move towards a single vanishing point. It is especially useful for drawing straight roads, railway lines, corridors, tunnels, hallways and the front view of a box.
To construct a simple one-point perspective room, begin by placing a horizon line and a vanishing point. Draw a rectangle to represent the back wall, or draw a larger frame around the scene and use the vanishing point to establish the floor and ceiling. Connect the corners of the back wall to the vanishing point. These lines create the receding edges of the room. Add doors, windows, tiles or furniture by ensuring that their depth lines also point towards the same vanishing point.
Imagine drawing a road through a rural Kenyan landscape. The road may be broad near the bottom of the page and narrow towards the horizon. Its two edges should converge towards a single point. Trees placed alongside it should become progressively smaller with distance, even if the spacing between them is similar in reality.
Two-Point Perspective
Two-point perspective is common when you look at the corner of a building, box or street rather than directly at one of its faces. The vertical edges remain vertical, while the horizontal edges recede towards two separate vanishing points on the horizon line.
For a basic construction, mark the horizon line and place a vanishing point to the left and another to the right. Draw a vertical line to establish the nearest corner of the object. From the top and bottom of this corner, draw lines towards both vanishing points. Decide where the side faces end by adding vertical lines between the receding guides. The resulting form can become a building, cupboard, parcel, vehicle or any other box-like subject.
The two vanishing points should normally be separated by a reasonable distance. If they are placed too close together, the object may look unnaturally wide or warped. Beginners often place both points near the centre of the page, which creates dramatic distortion. This can be useful for a deliberate wide-angle effect, but it is usually unsuitable for a calm, natural view.
When drawing a street with two-point perspective, each building may share the same horizon line but have different visible widths and heights. The edges facing one direction recede towards one vanishing point, and the edges facing the opposite direction recede towards the other. Checking these relationships is more important than drawing every brick or window immediately.
Three-Point Perspective
Three-point perspective is used when the viewer looks sharply upwards or downwards. In addition to the two horizontal vanishing points, vertical edges converge towards a third vanishing point above or below the scene.
Looking up from the base of a tall office block produces a strong upward view. The vertical edges appear to lean towards a point in the sky. Looking down from a high building or drawing a steep aerial view creates the opposite effect: vertical edges converge towards a point below the image. This technique can make a scene feel dramatic, monumental or unstable.
Three-point perspective requires careful control because every major directional edge is affected. It is best introduced after becoming comfortable with one- and two-point perspective. Use it when the viewpoint itself is central to the image, rather than adding it simply to make a drawing appear more complicated.
How Size and Distance Create Depth
Vanishing points are only one part of perspective. Depth is also communicated through relative scale. If two similar chairs are placed at different distances, the farther chair should generally be drawn smaller. The size difference should be gradual and consistent with the ground plane rather than arbitrary.
Overlapping is another powerful depth cue. When one form covers part of another, the viewer usually reads the covering form as being closer. A person standing in front of a wall, a tree partly hiding a hut or a foreground vehicle overlapping a distant road sign can establish spatial order without complex construction lines.
Vertical placement also matters. Objects resting on the ground tend to appear higher on the page as they move towards the horizon. A row of people standing on the same level can therefore become smaller and move closer to the horizon as they recede. Their feet should relate to the ground plane, not float at random heights.
Detail and contrast can reinforce depth. Nearby surfaces may carry sharper edges, stronger tonal differences and more visible texture. Distant forms can be simplified. This atmospheric effect should support the geometric perspective rather than replace it. A distant object that is painted pale but has an inconsistent outline may still appear spatially confused.
Ellipses and Perspective
Circular objects become ellipses when viewed from an angle. A cup, wheel, plate or pipe must be drawn with an ellipse whose width and openness reflect its orientation. A circle viewed directly from above may appear nearly round, while the same circle viewed at a shallow angle becomes flatter.
Ellipses are particularly important in one-point and two-point perspective because cylinders often appear in everyday scenes. The top and bottom ellipses of a cylindrical container should share a central axis. Their edges should also feel aligned with the surrounding perspective. If the top of a bucket is tilted one way and its body suggests another direction, the form will look unstable.
Practise drawing boxes first, then place cylinders inside them. A box gives you a clear sense of the object's axis and orientation. You can use this method for bottles, mugs, drums, columns and cylindrical water tanks.
A Practical Perspective Drawing Process
- Clarify the viewpoint. Decide whether the viewer is looking straight ahead, from above, from below or towards the corner of the subject. This decision determines the type of perspective needed.
- Place the horizon line. Mark the approximate eye level lightly. Ask whether the viewer should see the tops of objects or their undersides.
- Identify the main vanishing points. Look for groups of receding edges, such as road boundaries, rooflines, shelves or window frames. Extend them mentally until they meet.
- Block in large forms. Use boxes, cylinders and simple planes before adding surface detail. Large forms reveal errors more clearly than small decorative marks.
- Check scale and overlap. Compare objects that are similar in size. Confirm which forms are in front and which are behind.
- Add secondary structure. Divide walls, place doors and windows, and position furniture using the established guides. Repeated elements should reduce in size as they recede.
- Refine the drawing. Strengthen the important visible edges, vary line weight where appropriate and remove unnecessary construction lines. Add texture and shading only after the spatial structure is convincing.
Common Perspective Mistakes
Using several horizons without a reason
A single viewpoint normally produces one horizon line. Multiple horizon lines in the same scene can make objects appear to belong to different eye levels. There are exceptions, such as reflections, tilted viewpoints or intentionally distorted compositions, but these should be planned rather than accidental.
Making receding lines converge too quickly
If vanishing points are too close, ordinary objects may look stretched or bent. Move the points farther apart or reduce the angle of the view. A narrow field of vision usually produces more moderate convergence than an extreme wide-angle view.
Ignoring the ground plane
Objects can be individually well drawn yet appear to float if their bases do not relate to a shared surface. Use a floor line, road, table or other ground reference. Check where each object touches that surface and how its position relates to the horizon.
Adding detail before solving structure
Windows, patterns and shading cannot repair a box whose edges disagree with the vanishing points. Work from general to specific. A simple accurate construction is more convincing than a highly detailed but unstable one.
Applying This in Practice
Choose a familiar location such as a classroom, shop interior, bus stage, courtyard or residential street. Spend two minutes observing without drawing. Identify your eye level, the nearest major corner and the strongest lines that recede into space. Make a light construction sketch using only boxes and directional lines.
Next, test the drawing with three questions: Which objects are closest to the viewer? Which edges share a direction? Do repeated objects become smaller and move towards the horizon consistently? Correct these relationships before adding people, signs, textures or colour.
You can also practise with a simple household object. Place a carton on a table and draw it first in one-point perspective, then rotate it to show a corner and draw it in two-point perspective. Finally, view it from above and study how the top plane and ellipses change. This exercise separates the principles from the complexity of a full scene.
For digital drawing, perspective guides can speed up construction, but they do not replace observation. Use the guide to establish the framework, then check whether the chosen viewpoint communicates what you intend. In observational drawing, construction lines are tools for thinking, not evidence of failure.
Key Takeaways
- The horizon line represents the viewer's eye level and controls how much of a subject's top or underside is visible.
- Vanishing points organise groups of receding parallel lines; edges moving in the same direction should relate to the same point.
- One-point perspective suits a direct view, two-point perspective suits a corner view, and three-point perspective suits strong upward or downward viewpoints.
- Depth also depends on scale, overlap, vertical placement, detail and tonal contrast.
- Build scenes from large boxes, planes and cylinders before adding surface details.
- Check the ground plane, repeated forms and directional edges to prevent objects from floating or becoming distorted.
No comments yet.