
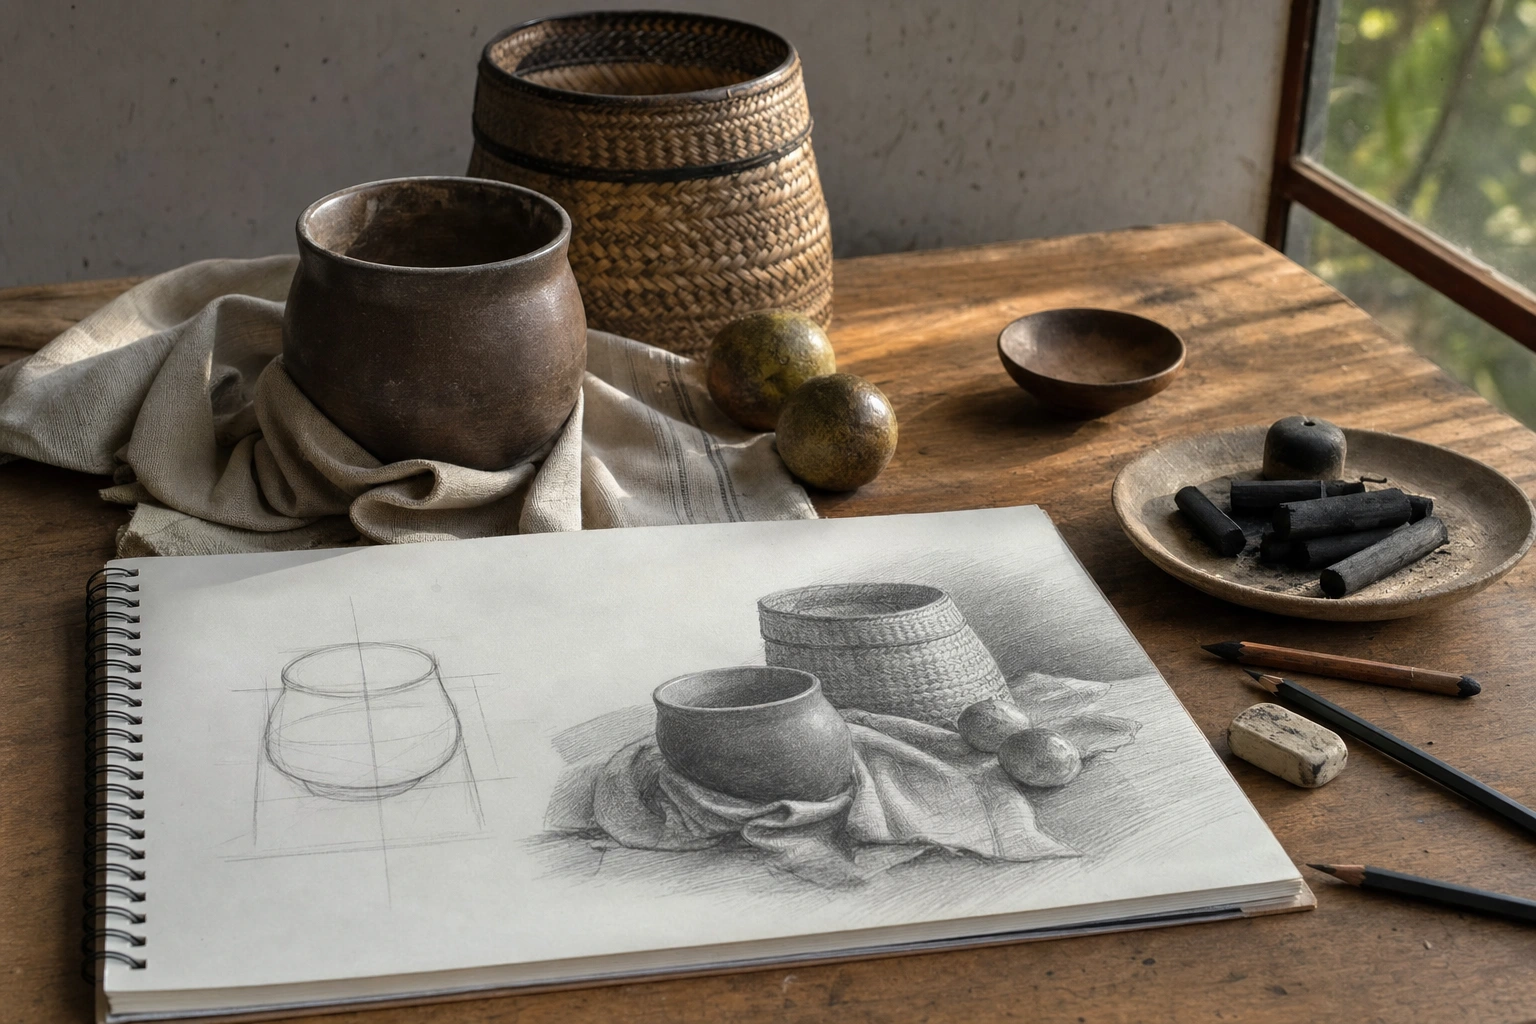
Drawing an object convincingly is less about copying every visible detail and more about understanding what you see. A cup, shoe, cooking pot or wooden stool can appear simple, yet each object contains relationships between shape, size, position, light and space. When those relationships are understood, the drawing becomes believable.
The principles of drawing objects provide a practical framework for observation and decision-making. They help beginners avoid guesswork and give experienced artists a reliable way to analyse form. Whether you are using a pencil and paper, charcoal, coloured pencils or digital tools, the same foundational ideas apply.
1. Observe Before You Draw
The first principle is careful observation. Many drawing errors begin when artists draw what they think an object looks like rather than what is actually in front of them. We recognise a mug as a familiar object, so the mind may supply a simplified symbol: a curved line for the rim, a rectangle for the body and a loop for the handle. However, the particular mug in front of you may have a tilted rim, uneven sides, a thick base and a handle that is partly hidden.
Before making marks, study the object as a collection of visual facts. Notice its overall height and width, the direction in which it leans, the visible surfaces and the way light falls across it. Ask questions such as:
- What is the widest part of the object?
- Where is the highest point and where is the lowest point?
- Which parts overlap others?
- What shape does the object create against the background?
- Where are the darkest and lightest areas?
Spend a short period looking without drawing. This pause improves accuracy because it shifts attention from memory to direct evidence.
2. Reduce Complex Objects to Basic Forms
Most objects can be constructed from a small number of basic forms: spheres, cubes, cylinders, cones, cuboids and planes. This does not mean that an object should remain looking geometric. Basic forms are construction tools that help you understand its structure.
For example, a water bottle may be treated as a combination of cylinders and a smaller neck. A wooden stool may begin as a cuboid for the seat and narrow cylinders or rectangular prisms for the legs. A mango can be developed from an irregular oval or a modified sphere. A cooking pot may contain a cylinder, an ellipse and several curved planes.
Begin with the largest form, then add smaller forms. Avoid starting with handles, buttons, stitching or decorative patterns. Details cannot rescue a drawing whose main structure is incorrect. If the underlying volume is sound, details can be added with confidence.
Construction lines
Light construction lines help reveal the object's centre, direction and symmetry. A centre line drawn through a bottle can show whether the neck is aligned with the base. Cross-contour lines, which wrap around a form, can indicate how a surface turns in space. These lines may later be erased or softened, but they are useful during the planning stage.
3. Establish Proportion and Scale
Proportion refers to the relationships between the parts of an object and between the object and its surroundings. An object may be well shaded but still appear incorrect if its handle is too large, its base too narrow or its height exaggerated.
One useful method is comparative measurement. Choose a simple dimension as a unit, such as the width of a cup. Compare the cup's height, handle size and distance from nearby objects to that unit. You can make this comparison with a pencil held at arm's length, keeping your arm extended and one eye closed. The method is not a substitute for judgement, but it helps you estimate relationships more consistently.
Look for alignments as well. The top of a bottle might line up visually with the edge of a book. The centre of a plate may sit directly below the centre of a vase. These vertical and horizontal relationships help you place forms accurately on the page.
It is also important to distinguish between the size of an object and the size of its drawing. A small object can be drawn large on the page, provided its internal proportions remain consistent. Decide early how much of the paper the object should occupy and leave enough space around it to prevent an accidental, cramped composition.
4. Understand Perspective
Perspective explains how objects appear to change as they move through space. Parts that are closer to the viewer often appear larger, while parallel edges may seem to move towards one another in the distance. Even simple household objects need some understanding of perspective.
When drawing a box, observe how its edges angle towards vanishing points. When drawing a cylinder such as a cup or bucket, remember that its circular openings appear as ellipses. The farther the opening turns away from a direct front view, the narrower the ellipse becomes. The top and bottom ellipses should generally share the same direction, unless the object is irregular or viewed under unusual conditions.
Perspective does not require every drawing to be planned with formal vanishing-point construction. For everyday observational drawing, it may be enough to compare the angles of edges and the width of visible surfaces. However, formal perspective becomes especially useful for furniture, buildings, product sketches and interior scenes.
Common perspective checks
- Are edges that should be parallel moving in a consistent direction?
- Is the top surface too visible or not visible enough?
- Do repeated forms become smaller as they move away?
- Does the object appear to sit firmly on the ground, or does it seem to float?
5. Draw the Whole Silhouette
The silhouette is the outer contour or boundary of an object. It is one of the strongest tests of accuracy because a recognisable silhouette can communicate an object's identity even without internal detail.
Before drawing small features, lightly mark the outermost points: the top, bottom, left and right edges. Then connect these points while observing changes in direction. Avoid automatically using smooth curves everywhere. A metal kettle, for instance, may contain both broad curves and sharper transitions around its lid, spout and handle.
Negative space is equally important. Negative space is the area around and between objects. The gap inside a handle, the space beneath a chair or the wedge between two stacked books can reveal errors more clearly than the object itself. Instead of thinking only, “I am drawing the handle,” also examine the shape of the opening created by the handle.
6. Show Three-Dimensional Form
A successful drawing makes a flat surface appear to contain volume. Form is communicated through contour, overlap, shading and the direction of marks.
Imagine how the surface turns around the underlying structure. On a sphere, curved strokes may follow the roundness of the form. On a box, changes in value can separate its front, side and top planes. On a folded cloth, lines should follow the valleys and ridges of the folds rather than being placed as random decoration.
Overlapping forms also create depth. If the handle of a mug passes behind its body, the interruption of the contour tells the viewer which part is in front. Avoid outlining every object with an equally dark line. Some edges are clear, while others are softened by shadow or lost against a similar background.
7. Study Light and Value
Value means the range from light to dark. It is one of the most important principles for making objects appear solid. Colour can attract attention, but value explains the structure of the form and the direction of the light.
First identify the main light source. It may be sunlight from a window, a desk lamp or an overhead light. Then look for the light side, the middle tones, the core shadow and the cast shadow. The cast shadow is the dark shape an object projects onto another surface. It helps anchor the object and shows the direction of the light.
Do not confuse the darkest area with every outline. A cast shadow may be softer at its edges than a contact shadow directly beneath the object. A shiny surface may contain a sharp highlight, while a rough woven basket may spread light more gradually. Squinting slightly can help you see the broad pattern of values without being distracted by small details.
Work from large value groups to smaller changes. Establish the overall light and dark pattern first, then refine the transition between planes. If you are using graphite, vary pressure, layering and the hardness of the pencil. With charcoal, use the side of the material for broad tones and the point for accents.
8. Represent Texture and Material
Texture describes how a surface appears to feel: smooth, rough, glossy, soft, grainy or woven. The aim is not to cover every surface with repeated marks. Instead, texture should support the object's form and material identity.
Glass may be suggested through sharp highlights, transparent overlaps and carefully controlled edges. A clay pot may need irregular marks, broken tones and subtle changes in surface. Wood can be described with directional grain, but the grain should follow the object's volume rather than run flat across it. Fabric often depends on soft edges, folds and changes in value rather than numerous individual threads.
Use contrast selectively. A highly detailed area attracts attention, while a quieter area allows the viewer's eye to rest. In a drawing of a woven basket beside a smooth metal spoon, contrasting textures can make both objects clearer.
9. Consider Composition and Context
Composition is the arrangement of the object or objects within the page. Even a technically accurate drawing can feel weak if it is placed awkwardly or lacks a clear visual focus.
Decide whether the object should be centred, placed to one side or grouped with other forms. Consider the viewing angle and the background. A simple background can make a small object easier to study, while a domestic setting can explain scale and use. For example, a drawing of a traditional woven basket may gain meaning from its placement near folded cloth or agricultural produce, provided the surrounding elements do not compete with the basket itself.
Look at the margins around the subject. Unequal space is not automatically a problem, but it should feel intentional. Crop the object only when the close view strengthens the composition. Otherwise, allow enough surrounding space to show how it sits on a table or ground.
10. A Reliable Step-by-Step Drawing Process
- Choose and arrange the subject. Use one object or a small group with clear lighting. Avoid excessive visual clutter at the beginning.
- Observe the main direction. Identify the object's tilt, centre line, highest point and widest point.
- Mark the overall envelope. Lightly indicate the outer height, width and major limits of the subject.
- Construct basic forms. Use cylinders, boxes, spheres and planes to describe the underlying volume.
- Check proportion and perspective. Compare widths, heights, angles, alignments and visible surfaces.
- Refine the silhouette. Replace general construction marks with the specific contours of the object.
- Add major shadows. Establish the light side, shadow side and cast shadow before small details.
- Develop material and texture. Use marks that follow the surface and vary edge quality according to the material.
- Strengthen selected accents. Deepen contact shadows, important overlaps and focal details without darkening everything equally.
- Review the drawing as a whole. Step back, compare it with the subject and correct the largest error first.
Common Problems and How to Correct Them
Drawing too many details too soon
If you begin with a pattern, label or handle, you may become attached to a misplaced feature. Return to the larger forms and check the position of the feature against the whole object.
Using outlines instead of observing planes
Heavy outlines can flatten an object. Study where the surface changes direction and use value or softer edges to describe those transitions.
Making every shadow equally dark
Uniform darkness removes the sense of light. Identify the strongest shadow areas and allow other tones to remain lighter.
Ignoring the contact with the surface
An object without a contact shadow may appear to float. Add a controlled darkening where it meets the table, floor or another object, then soften the shadow as it extends away.
Correcting only one small area
When a drawing looks wrong, compare the complete silhouette and major value pattern before retouching details. Large corrections usually produce a greater improvement than repeated adjustments to tiny marks.
Applying This in Practice
For a focused exercise, place a cup, a folded cloth and a small fruit on a table near a single light source. Spend two minutes observing. Make a light envelope around the group, then construct each object using basic forms. Check the relative height of the cup, the width of the fruit and the visible opening of the cup before adding details.
Next, draw the major shadow shapes as simple blocks of tone. Ask whether the cast shadows point in the same direction. Add only a few material clues: the smooth highlight of the cup, the soft folds of the cloth and the uneven skin of the fruit. Finally, compare the negative spaces between the objects with the reference arrangement.
Repeat the exercise from a different viewing angle or with a different light source. Keep the first drawing rather than discarding it. Comparing attempts helps you identify whether your main challenge is proportion, perspective, value, edges or texture. You can then practise that specific principle instead of drawing without a clear purpose.
Key Takeaways
- Observe the object carefully before relying on memory or symbolic shapes.
- Construct complex subjects from basic forms before adding small details.
- Use comparative measurement, alignments and perspective checks to control proportion.
- Use silhouette and negative space to test the accuracy of the drawing.
- Establish the main light, shadow and cast-shadow pattern before refining texture.
- Let marks follow the form and use different edge qualities to describe materials and depth.
- Correct large structural errors before spending time on minor details.
No comments yet.